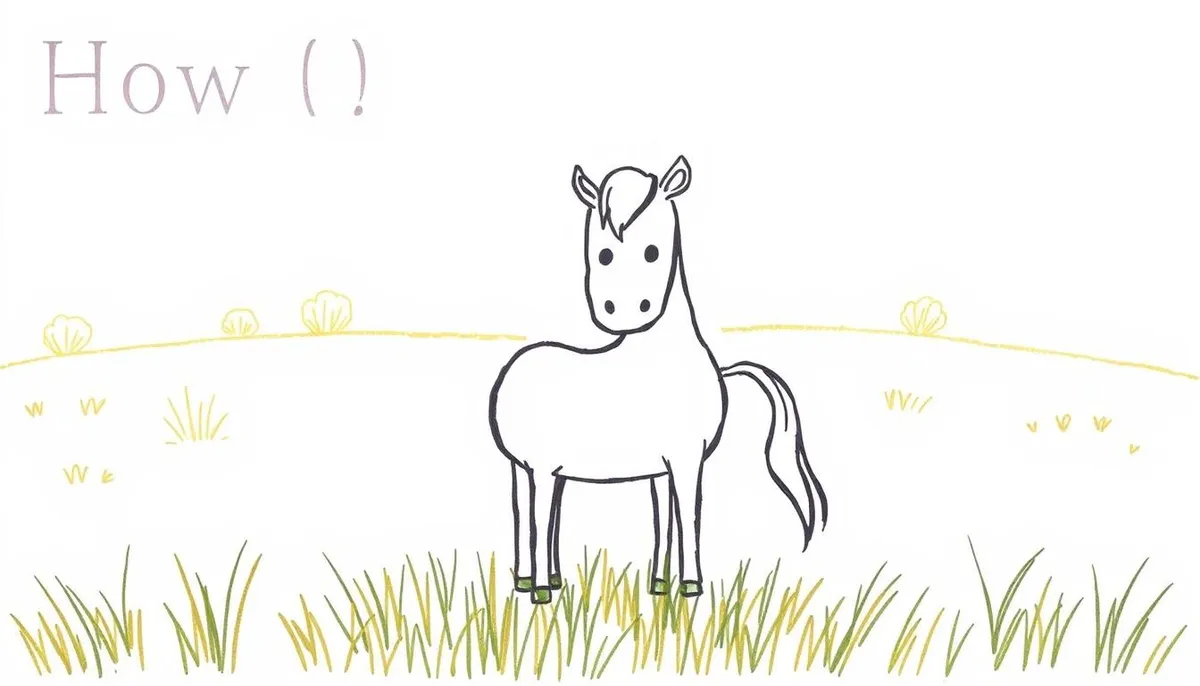
Do you want to learn how to draw a horse easily? This guide is perfect for beginners and children. It shows how to create a beautiful drawing, step by step. We start with a simple sketch and finish with details like shadows and highlights.
We begin with simple shapes like circles and rectangles. Then, we make an anatomical sketch of the horse. Next, we clean up the drawing by reducing the opacity and adding a new layer named “Clean Art.” After that, we move on to colors, lock the pixels, and use natural tones. For volume, we use a watercolor brush. The finishing touch is a gradient background with a soft shadow and a bright line.
We will use photos and models with grids as references. This tutorial, based on Daniel Puente's digital techniques, is easy to follow. You will learn to draw different horse poses, such as profile or galloping.
Whether you are just curious or a young artist, this guide is designed to be simple and easy to follow. Just grab a pencil and an eraser and start doodling step by step. You will love the final result.
Key Points
- A step-by-step tutorial designed for beginners and children, clear and simple.
- Method using basic shapes to frame the horse step by step.
- Cleaning the sketch: opacity 20–30% and layer “Clean Art.”
- Guided coloring: lock transparent pixels and earthy tones.
- Shadows, highlights, and gradient background for a polished look.
- Variations of poses: profile, front, side, grazing, and galloping.
- Emphasis on photo references and grids for quick learning.
Introduction to Horse Drawing for Beginners
The horse captures attention, whether in a workshop or riding arena. Learning to draw in a relaxed manner is easy with a clear and step-by-step method. This tutorial is ideal for everyone, adults and children, and adapts to both digital and paper.
Why the Horse is an Excellent Subject to Draw
From the side view, the shape of the horse is easy to grasp with its large volumes and flowing lines. We start with the large shapes, then add the details. This helps to master the proportions. The theme is very appealing to riders and children, making the learning enjoyable.
References and Photo Models for Better Learning
A selection of good references shows realistic poses. It is helpful to look for photo collections, such as daily 31-day challenges to improve step by step. Using CLIP STUDIO PAINT, Daniel Puente explains how to divide the process into layers. This technique can also be applied to drawing on paper, keeping reference images in view.
Simple Recommended Materials for a Step-by-Step Tutorial
- Pencil or digital pencil tool, eraser, A4 paper or digital layers
- G-pen/Plume G brush, watercolor brush, Fill tool
- Layer management: rename, color, arrange to follow the tutorial without confusion
- Bounding frames and grids to place the subject on the page
- Photo references at hand for better learning and accurate drawing
Structuring the Horse with Simple Shapes
Start with a frame on a sketch layer. This helps manage the scale well and learn where to place each element. Progress gradually to first draw a silhouette before tackling the details.
Using Circles, Ovals, and Rectangles for the Body
Draw two large circles to represent the front and back of the horse. Connect them with two curves to form a “bean” silhouette. Add an oval under the ribcage and a rectangle for the belly; this will help with volume.
Use smooth curves to stay flexible. This method allows for easy adjustments and helps learn the horse's volume step by step.
Building the Head and Neck with Two Connected Circles
For the head, place a small circle for the muzzle and a larger one for the skull. Connect them with lines for the nose. For the neck, draw two parallel lines and then form a curve towards the shoulder.
Ensure that the nose and throat are well aligned. Keep your approach simple to understand the proportions well.
Sketching the Legs with Segments and Joints in Circles
To draw the front legs, use narrow rectangles for each segment and small circles for the joints. Finish with an oval for the hoof. For the back legs, start with a circle for the thigh and continue with two segments, marked by circles for the joints.
Maintain a clear structure with a slight inclination. This simple method is very effective for understanding how the horse's limbs move.
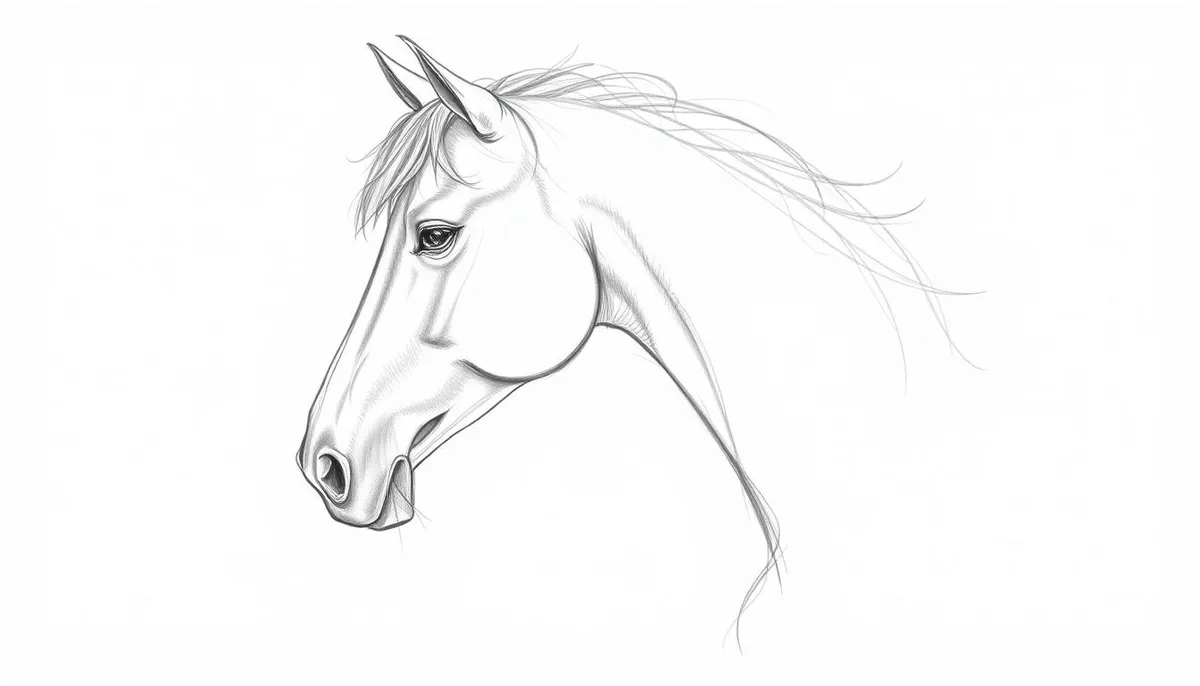
Profile Pose Tip: The Easiest View to Start
Draw the horse in profile to easily see the back, neck, and posture. Reference drawings from Daniel Puente illustrate this technique well. It’s the simplest view to start with, especially with a reference frame.
| Element | Basic Shapes | Quick Markers | Step-by-Step Tip |
|---|---|---|---|
| Trunk | 2 circles + 2 curves | “Bean” silhouette | Block the volume before the details |
| Head and Neck | 2 connected circles + 2 lines | Straight cheek, soft nape | Start small, enlarge if needed |
| Front Legs | Rectangles + small circles + oval | Readable joints | First trace the axis, then thicken |
| Back Legs | Thigh circle + 2 segments | Sharp hock angle | Check the ground inclination |
| Frame | Bounding rectangle | Scale and margins | Check the profile pose step by step |
From Sketch to Clean Line
This step helps to make a horse more realistic from simple shapes. The tutorial guides step by step to avoid stress while learning to draw. We adjust the volume and lines before finalizing with a precise outline.
Thicken/thin lines for anatomy
Start by connecting the body circles with flowing lines. Thicken the muscular areas like the chest and croup. Then, thin the lines towards the finer parts, like the legs and muzzle. This makes the drawing more dynamic and helps understand the animal's structure.
Curvatures of the limbs between the joints
Straight segments become soft curves. Between the shoulder and the knee, add a slight dip. Slightly bulge near the knee, hock, and hoof. These arcs give the impression that the horse supports its own weight.
Place the eye, nose, and mouth on the head
Position a small circle for the cheek below the larger circle of the head. The eye goes in the upper third, the nose forward, and the mouth just below. Observing photos helps master the spacing and angle of facial details.
Cleaning the sketch: opacity, new layer, and outline
- Reduce the opacity of the sketch between 20 and 30%.
- Then create a layer named “Clean Art” and assign it a specific color.
- On this new layer, make the final outline, making it sharper and more consistent.
- If you are working on paper, use a fine marker or a thicker pencil to finalize on a new sheet.
| Step | Key Action | Quick Tip | Goal |
|---|---|---|---|
| Line Modulation | Thicken the mass, thin the ends | Light pressure at the wrist | Readable volume |
| Limb Curvatures | Dips between joints, bulging at the joint | Draw in one motion | Natural flow |
| Head Details | Cheek, eye, nose, mouth aligned | Compare with a photo | Resemblance |
| Cleaning | Opacity 20–30%, new layer | Darker outline | Clear finish |
Basic Colors and Simple Coloring
Start by creating a new layer between your drawing and the final outline. Name it Base Color. Choose an easy-to-see color, like yellow, to distinguish it quickly. This approach helps children and beginners easily keep track.
Use the G-pen tool or Fill tool to color the horse. Choose a medium gray or a light earth color. Afterward, erase any overflow to have a clean silhouette. This creates a uniform base ready for the next steps.
Pay attention to the contours of the muzzle, ears, and mane. These parts absorb color quickly. Keep your color layer below the outline so the lines remain clear. The result is simple and clear, perfect for children, before adding details like shadows and highlights.
To avoid mistakes, lock the color layer once you finish filling it. If you make an error, gently correct it to maintain the shape of the drawing. With this base, your drawing is ready for more detailed effects later.
Coloring: Shadows, Highlights, and Volume
This step adds relief to the horse. Learn easily with a tutorial that guides you step by step.
Choose a Base Hue and Lock Transparent Pixels
Choose a light color, close to a warm beige for the fur. Then fill the layer and activate the lock on the transparent pixels. This allows you to paint without going outside the lines.
Duplicate the gray flat layer intended for the shadow. This is a simple and effective method for beginners.
Shadows on Legs, Muzzle, and Mane
Use a watercolor brush to darken the legs. Make the muzzle and mane even darker.
Emphasize under the eyes and around the nose for more depth. Progress gradually, blending well for a natural look.
Highlights on Cheeks, Neck, and Side Muscles
Apply highlights on the cheeks, neck, and sides. Add light on the tops of the legs and blend carefully.
Finish with a warm light on the back and head. Duplicate this stroke and apply a blur for a controlled luminous effect.
Gradient Background and Cast Shadow for a Realistic Look
Create a background with a gradient that matches the coat. Use a gray layer for the shadow under the legs, adjust, and erase the excess.
Add shadows under the hooves and soften the edges. This technique helps give an impression of stability and volume.
Step-by-Step Variations: Poses and Movements
Follow the step-by-step method starting from simple shapes. First, build the volume, then check the proportions, and finish with the details. This approach, easy even for children, allows for effective progress.
Standing Horse Facing Front and Side
First, draw a vertical frame for the front, horizontal for the side. Add an oval for the thorax, another for the croup. Connect them with a neck shaped like a cylinder.
Progress step by step, draw the legs straight and parallel. Finish with the hooves, simplified into trapezoidal shapes, always step by step.
Grazing Horse: Elongate the Neck
Gently elongate the horse's neck downward, keeping its back flat. Slightly tilt the head towards the grass.
Visualize it simply: an elongated neck, an oval for the head. Use the step-by-step technique, ideal for children.
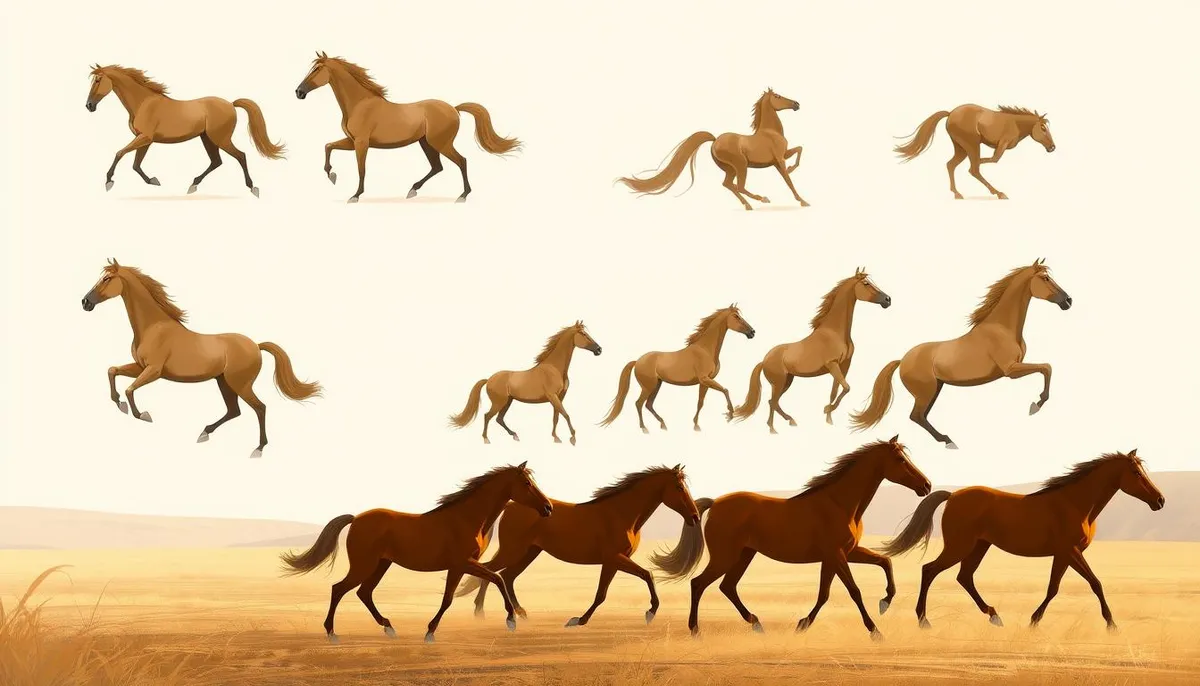
Galloping Horse: Mane and Tail in the Wind
Note that the horse's legs can lift simultaneously. Start with the key attitudes of the legs.
Then add the mane and tail, which fly in the wind. Continue step by step, keeping the general shapes simple, and progress step by step.
Foal: Long and Thin Proportions
Stretch the legs, reduce the size of the torso, and slightly widen the head. Mark the shoulders and give the foal a somewhat awkward look.
Proceed step by step, with fine lines. This simple method is particularly suitable for children.
Horse and Rider: Tack Elements and Posture
In a dressage movement, lift the horse's right front leg and stabilize the rider's position. Add details like the bridle, reins, and also the saddle, which can be dressage or western.
Always proceed step by step: first the volumes, then the posture, and finally the details. This remains simple and precise, step by step.
| Pose | Basic Volumes | Axes and Markers | Key Details | Quick Tip |
|---|---|---|---|---|
| Standing Front | Two body ovals + neck cylinder | Vertical symmetry of the chest | Hooves aligned, ears upright | Measure the gap between the front legs step by step |
| Standing Profile | Thorax oval, croup oval | Slightly curved back line | Marked hocks, tail resting | Build step by step from thick to thin |
| Grazing | Long cylinder neck | Head tilt towards the ground | Lower lip close to the grass | Keep the pose simple for children |
| Galloping | Compact masses of the trunk | Diagonals of the suspended limbs | Mane and tail in the wind | Stagger the steps step by step |
| Foal | Stretched legs, reduced torso | Head slightly wider | Thin joints, high knees | Draw step by step without pressing |
| Horse and Rider | Coupled horse/rider volumes | Shoulders–hips alignment | Bridle, reins, saddle visible | Detail the tack at the end, in a simple way |
Easy Horse Drawing
To easily draw a horse, start by gathering profile photos. Use images from Steve Bloom or Getty Images and a simple grid. These images will help you maintain a good pace in each step of the drawing.
Begin by drawing the basic shapes of the horse in profile. Use a large oval for the thorax and a circle for the croup. For the abdomen, draw a soft rectangle. Then, connect two circles to create the horse's head and neck. Draw the legs using segments and place small circles for the joints.
To add details, start with the cheek and soften the transitions between the different parts. Reduce the opacity between 20 and 30%, then use a Clean Art layer to ink delicately. This method simplifies the process without making it complicated.
Next, add a base color under the drawing and clean the edges as needed. Lock the transparent pixels to add shadows and highlights. This will give volume to your horse.
Finally, create a background with a soft gradient. Duplicate the horse drawing to create a shadow on the ground, and add a fine line of light on the back with a blur. This technique mixes tips from Daniel Puente's CLIP STUDIO PAINT with classic methods.
| Step | Key Action | Visual Goal | Quick Tip |
|---|---|---|---|
| References | Photo board + grid | Reliable proportions | Choose a sharp profile |
| Shapes | Circles, ovals, rectangle | Immediate reading | Draw wide, without pressing |
| Anatomy | Curvatures + cheek | Vibrant lines | Observe shoulders and hocks |
| Inking | Opacity 20–30% + clean layer | Clear and sharp line | Vary thickness |
| Color | Flat under the line | Uniform base | Eraser for overflow |
| Volume | Locking + shadows/highlights | Natural relief | Emphasis on muzzle and mane |
| Finishing | Gradient + cast shadow | Ground anchoring | Blurred light line |
Resources, Practical Tips, and Inspiration
Start drawing horses with simple gestures, then detail more. This guide combines easy-to-follow methods and a pace suitable for everyone. Always keep a notebook nearby to alternate between quick sketches and coloring.
Using Grids and Layers to Progress
Use a light grid to properly place the head, chest, and hips. Frame the drawing in a rectangle to maintain body alignment.
On the computer, name your layers: Sketch, Clean Art, and color. Assign a color to each level and arrange them. Lock the pixels you don't need, and duplicate the color to create shadows.
Daily Exercises: Challenge and Improvement
Challenge yourself to draw from 31 photos in a month. Limit yourself to 10 or 15 minutes per drawing to gain speed.
Keep all your work. Compare your drawings from the first to the last week. You will see your progress: more precise lines, better proportions, and more natural movements.
For Children: Short Steps and Coloring
Divide learning into four parts: main shapes, inking, basic coloring, and then final coloring. Avoid complex shadows and use bright colors.
Take small breaks often. Praise them for every little success. An illustrated step-by-step guide will keep them motivated.
Creative Ideas: Unicorn, Mustang, Quick Sketches
For a magical twist, add a horn to your horse to create a unicorn. Explore the mustang for its defined muscles and posture.
Vary the poses: galloping, eating, during dressage. Try drawing from memory and then compare with a photo to adjust.
The French Tack: Equestrian Inspiration and Craftsmanship
Examine the leather, saddler stitching, and finishes closely to perfect your drawings. Equestrian equipment details rich textures to capture.
This attention to detail adds realism. It allows for better guidance in coloring: highlights, shadows, and sharp contrasts.
Partner Note: La Sellerie Française offers high-end products, made in France, unique, custom-made or in limited series, manufactured from A to Z in France by the best artisans.
The excellence of craftsmanship inspires the precision of lines and the realism of textures. To better draw equestrian equipment, observe the material, colors, and care given to finishes.
Incorporate these elements into your own guides: sketches, clean lines, precise colors, and discreet finishes for a harmonious result.
Conclusion
With a clear method, drawing a horse easily is possible for everyone. Start with the outline of its profile. Then, build the body using simple shapes. Be sure to include the essential markers of the head like the cheek, eye, nose, and mouth.
For a clean drawing, use different layers. Start by applying the base colors. Then, lock the transparent pixels to paint without worrying about the edges. Next, add specific shadows on the legs, muzzle, and mane. Add highlights on the cheeks, neck, and sides to make the volume clearly visible.
Prepare your presentation carefully. A gradient background, a transformed cast shadow, and a blurred light line add realism. Variations in postures such as facing front, side, grazing, galloping, foal, horse, and rider demonstrate movement and proportions.
Regular practice is key to progressing quickly. Exploring blogs and participating in photo challenges can help. Daniel Puente shares his techniques in CLIP STUDIO PAINT, useful for both paper and digital drawing. This guide is for everyone: children, beginners, and self-taught artists. It offers a clear method for confidently drawing a horse.
FAQ
Where to start for an easy step-by-step horse drawing?
Start with a reference board and draw a frame. Trace two large circles for the body and two for the head. Then add the legs as rectangles and small circles for the joints. This helps avoid getting lost in details right from the start.
What pose is the easiest to learn to draw a horse?
Drawing a horse in profile is the easiest. It helps to place the neck, back, and legs correctly. It’s excellent for beginners and children.
What minimalist tools for a step-by-step tutorial, traditional or digital?
For hand drawing, take a pencil, eraser, A4 paper, and a fine marker. In digital, use CLIP STUDIO PAINT with specific tools like the blue rough pencil, G-pen, and other tools for color and details.
How to properly sketch the anatomy of the horse?
Assemble geometric shapes with curves for the muscles. Make thick lines where the body is massive and thin towards the legs. Use photos to place the eyes, nose, and mouth correctly.
How to clean my sketch without starting over?
Reduce the opacity of the sketch and trace on a new layer for a clean line. If you are working on paper, trace the sketch with a fine marker on a clean sheet.
What colors to choose for simple horse coloring?
Choose natural colors like bay, beige, or gray. Start with a uniform base and adjust the edges with an eraser. This technique is perfect for children.
How to easily shade and add highlights?
Lock the transparent pixels of the color layer. Use a watercolor brush to shade and add highlights according to the shape of the muscles.
How to create a clean final rendering with background and cast shadow?
Start with a simple gradient background. Duplicate the horse's body to create a shadow on the ground, adjust it, and soften the edges. Finish by adding a light line on the horse's back.
What poses to practice to progress step by step?
Practice various poses: profile, front, side, a grazing horse, galloping, a foal, and with a rider. This will help improve your technique.
How to use grids and frames for better proportions?
Use a frame to place the horse and draw a light grid. This will help you maintain good proportions of the different parts of the horse.
Where to find reliable references to learn and draw step by step?
Check out horse drawing blogs, photo series, and Daniel Puente's tutorials (danipuente.com, Instagram @danipuente_conceptart, ArtStation). Photos of real models are useful for accurate proportions.
Do digital tips apply to paper/pencil?
Yes. Follow the same steps: shapes, sketch, inking, flat, and finishing. Only the tools differ between digital and traditional.
How long does an easy horse drawing tutorial for children take?
Plan for 20 to 40 minutes. Spread the time across the steps: drawing shapes, inking, coloring. Keep the exercise simple and fun.
How to organize my layers for a clear workflow?
Start with a layer for the sketch, then add a layer for the final drawing and one for color. Separate the background and shadows on distinct layers for more ease.
How to make a galloping horse more dynamic?
Make the body diagonal and vary the angle of the legs. Let the mane and tail fly for more dynamism.
Creative coloring ideas after the step-by-step?
After mastering the basic horse, transform it into a unicorn or draw a mustang. Do quick sketches or a horse with a rider. The important thing is to keep it simple and always have references.
Where to find realistic inspiration for tack?
Check out La Sellerie Française's website (laselleriefrancaise.com). Their products are an excellent source of inspiration for tack details.
Keyword “easy horse drawing”: what to remember in summary?
Remember this: references, simple shapes, sketch, clean layer, flat color, shadow adjustments, and finishing touches like the background and shadow. A good tutorial simplifies learning step by step.